从拍摄的手写体数字串纸张照片到自动识别数字,本文从手写体数字分割、训练分类器和结果比较三方面结合过程图及代码解读手写体数字识别方法。

实现使用Python语言、numpy科学计算库和opencv图像库。方法使用SVM和卷积神经网络。其中SVM使用scikit learn框架,卷积神经网络使用TensorFlow框架。将MNIST数据集划分为训练集和测试集,SVM法可达0.9852的准确率,卷积神经网络可达0.992的准确率。而使用MNIST数据集训练,使用自制数据集测试时,准确率有所下降,在容易集的73个数字中,SVM准确率0.808219,卷积神经网络准确率为1。在难集上SVM平均准确率0.64951525,神经网络平均准确率0.76647275。实验证明,数字的切割方式对测试准确率的影响极大,SVM法对测试集尤为敏感,而神经网络能适应更多样的测试集。
手写体数字分割
自制测试数据含8张图片(后三张为个人另外准备),目标是将图片中的数字以所在数字串为组按顺序切割成与MNIST数据集一致的格式。
A4纸矫正
A4纸矫正请参见[CVPR] A4 Paper Sheet Detection and Cropping with Hough Transform and Warping和代码,已对代码进行改进,能支持更多测试数据。
下面分别为图0到图7(八张图)的结果,它们的命名与0_A4.bmp类似。


图像二值化处理
数字的训练和测试输入均为二值像素(黑色为0,白色为255或1)。对图像进行阈值处理即可,即低于阈值的均设为0,高于阈值的均设为255。由于我们的输入图像为白底黑字,矫正后的A4纸的部分黑色边缘需裁减(crop),避免被误认为黑色文字。又由于MNIST中用白色表示数字,黑色表示背景,要将我们图像中的黑白色反转,即低于阈值的均设为255,高于阈值的均设为0。对大部分图像而言,阈值为127可区分出文字和背景。值得注意的是,由于文字不是全黑(边缘为灰色),有时候会和纸张的阴影混淆。阈值越高,保留的灰色越多,但可能也将背景的阴影保留了下来;阈值越低,保留的灰色越少,但可能使文字断裂现象比较严重。因此阈值的选取不能一概而论,需根据图像的颜色和文字的粗细等情况选取。
|
|
以1_A4.bmp为例:
左:裁剪10px边缘图;中:以阈值140处理的二值图;右:以阈值120处理的二值图
判断数字串书写方向
我们对一张图上数字串书写方向的直观感受是:从横向及纵向对数字“投影”(假设数字都堆叠在了该方向上),则数字密集地堆叠为几堆的方向是书写方向,数字零散分布的方向不是。
|
|
h_bin(取桶的含义)记录图片每行的白色(数字的颜色)像素个数,size和图片的纵向长度一致;w_bin记录图片每列的白色像素个数,size和图片的横向长度一致;n_h_zero_area表示纵向不相连白色域的个数;n_w_zero_area表示横向不相连白色域的个数。由于分布在横向或纵向总的白色像素数是一样的,联通域越少说明单个连通域的白色像素数越多越密集。n_h_zero_area > n_w_zero_area表示横向连通域个数少,分布密集,为横向。以7_A4.bmp为例,输出h_bin、w_bin、n_h_zero_area和n_w_zero_area:
|
|
数字串识别
所给图片上有多个连串数字,首先需要识别出数字串作为整体。采用的方法是数字图像处理中的膨胀。利用膨胀将不同的数字串区分开后,就可以用OpenCV的寻找联通区域函数cv2.findContours来找出字符串了。
OpenCV中膨胀的操作和解释见Morphological Transformations。简单来说我们需要选取一个kernel(或称为filter),kernel上有0或1,kernel经过图像覆盖的区域内只要至少有一个像素和kernel上的1重合,该像素点即为1。这在我们识别数字串以及后面将做的识别单个数字中有着广泛的应用。
本任务中将用到以下kernel
|
|
一张纸中,对数字进行(多次迭代)膨胀,数字变粗直至连接在了一起。下图第一排为膨胀的结果,第二排为将联通域用矩形框起来的结果。
左:kernel_ellip迭代10次膨胀;中:kernel_ellip迭代20次膨胀;右:kernel_ellip迭代1次后kernel_cross_h迭代10次
显然,我们想要的是右图的膨胀方式,正确将数字串膨胀连接在一起。错误的膨胀方式如左图没有将数字串连接起来,单独找到了一个个数字。中图膨胀过度使左右列的两串数字(或上下排两串数字)连接了起来,导致错误识别。
右图采用的解决方法是根据数字串的书写方向进行膨胀:横向数字串进行横向膨胀,纵向数字串进行纵向膨胀(斜向如对角线方向书写的暂不讨论)。
|
|
值得注意的是
kernel_cross_h(或kernel_cross_w)不宜过长,过长会使得数字串的头或尾进行过长的无必要膨胀。- 在此前提下为了避免有些数字串中的数字空隙较大,先用
kernel_ellip进行一次(或多次)膨胀。 使用条件判断过滤个别“乱入”的笔画。
1234if is_vertical and (w < 30 or w > 100 or h < 70 or h > 520):continueelif (is_vertical == False) and (h < 30 or h > 100 or w < 70 or w > 520):continuev
左:只用kernel_cross_h;中:加kernel_ellip;右:过滤一个点形成的小连通域
使用这种方法,可以较好地适用于全部图片,下面展示了部分结果,数字串无论长短胖瘦横竖均可:
单个数字分割
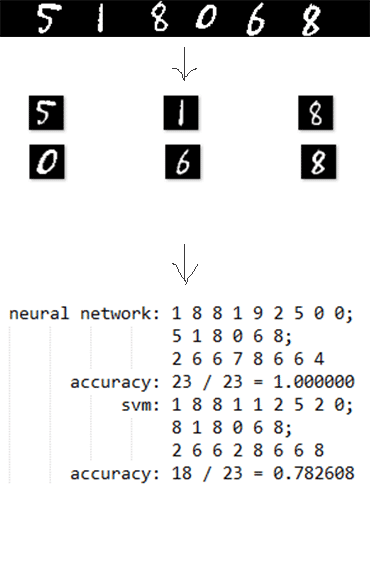
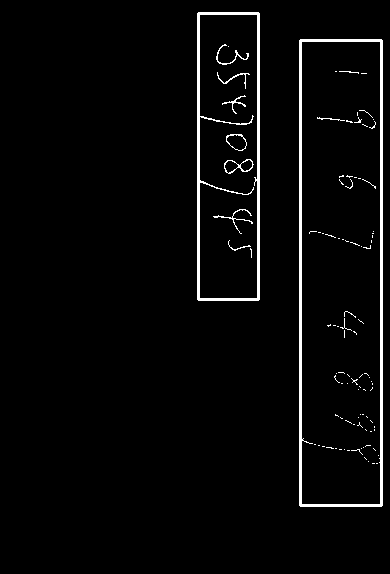
以7_A4.bmp的第二列数字串518068为例:
对每一个数字串,如何识别出单个的数字。同理可用OpenCV的寻找联通区域函数来找出每个数字。但前提是数字内部不断裂,数字之间不粘连。数字断裂的问题再次可用膨胀解决,同样要注意膨胀的方向,避免将相邻的数字连接起来。粘连的问题业界有“滴水算法”,即利用同一个数字的笔画如流水般自然的趋势找出一个数字内的笔画。简单的方法可用等距切割,适用于大小均匀分布的手写体数字。
找出单个数字之后需要缩放成28*28像素以适应MNIST数据集。此处缩放的策略非常关键。若不考虑原数字的宽高比直接resize成28*28,数字会变形失真。
可以看到诸如数字1这种过胖或过瘦的变形严重,其他的虽然肉眼可辨别,但是对于SVM这种基于模板和神经网络这种基于数据的方法会产生较大的误差。
正确的策略是先按原数字宽高比缩放,空缺的地方用背景色(黑色)填充(padding)。我采用的是将原数字的bounding box居中,上下/左右均匀padding。参考自MNIST官网:
With some classification methods (particuarly template-based methods, such as SVM and K-nearest neighbors), the error rate improves when the digits are centered by bounding box rather than center of mass.
另外还需注意的是最后需要给数字整体进行padding,使得28*28像素图像中边缘约4个像素内是背景(黑色),这是通过观察MNIST数据集得知的,同样是为了使自制的数据集尽量和和使用的训练集相似。
最后需要注意的是按顺序读取数字。通过实践观察知,cv2.findContours在图像中从下到上查找,因此我们需要先旋转图片到纵向书写方向,首个数字在图片下方的方向,并在找到连通域后恢复为水平方向以和MNIST数据集一致。
整体代码如下:
|
|
训练分类器
MNIST数据集
官方网站THE MNIST DATABASE of handwritten digits有该数据集的基本信息和各种方法的准确率,SVM和卷积神经网络是准确率较高的两种方法。
每个数字为28*28像素的二值图,训练集有六万个样例,测试集有一万个样例。数据量庞大,自身数据测试准确率很高,因此我们主要关注该数据集数字的分布方式(若自制测试集和其类似,应当能达到0.98及以上的准确率)。

credit: blog (leonardoaraujosantos)
SVM
SVM (Support Vector Machines)译为支持向量机,是一种常用的机器学习方法。使用scikit-learn库训练SVM分类器就不用造轮子了,官方文档对SVM及其训练预测均有一定介绍。下图是SVM使用的四中kernel,我们采用的是RBF kernel,能取得相对高的准确率。
scikit-learn的使用很简洁,自身也已集成MNIST数据集,可直接调用。为了增大数据量,将全部数据集都用作训练集,第一次训练后将模型存入磁盘,以后便可直接载入。参数参考自svm_mnist_digit_classification,将MNIST数据集划分为训练集和测试集,可达0.9852的准确率。
|
|
测试使用自制的测试集,即前文分割单个数字串的数字的split_digits_str函数返回的digits_arr。由于已将数字图片存在本地磁盘,也可从文件夹中读取生成digits_arr,这样更灵活自如。
|
|
预测代码的实质只有一句话:predicted = classifier.predict(digits_arr)
|
|
卷积神经网络
使用TensorFlow框架训练卷积神经网络分类器,参考官方入门教程Deep MNIST for Experts即可。
在官方程序基础上增加模型保存saver.save(sess, "models/model.ckpt")和从本地加载saver.restore(sess, "models/model.ckpt"),这对于反复测试很有必要。将预测数据改为自制数据即可。
此处使用的卷积神经网络由两层卷积层(Convolutional Layer)后接最大池化(max pooling)操作和一层连接层(Densely Connected Layer)组成,最后要dropout。训练两万次后,能达到够好(非最好)的准确率99.2%。
|
|
结果比较
| 图片序号 | 0 | 1 | 3 | 4 | 5+6+7 | 平均 |
|---|---|---|---|---|---|---|
| SVM准确率 | 9 / 14 = 0.642857 | 8 / 17 = 0.470588 | 46 / 60 = 0.766667 | 28 / 39 = 0.717949 | 59 / 73 = 0.808219 | 150 / 203 = 0.738916 |
| 卷积神经网络 | 12 / 14 = 0.857143 | 10 / 17 = 0.588235 | 48 / 60 = 0.800000 | 32 / 39 = 0.820513 | 73 / 73 = 1.000000 | 175 / 203 = 0.862068 |
另外,两者训练时间相差不大(约7-9小时,TensorFlow使用GPU)。
基于此结果,可认为卷积神经网络优于SVM。
实际不止于此,前文提到的未按宽高比resize的略有变形的数字在SVM分类器上的测试结果极差,低至0是常态。经过多次试验发现数字的粗细、宽扁、大小对SVM预测的准确率有很大影响,而卷积神经网络分类器更能适应数字形态的变化。
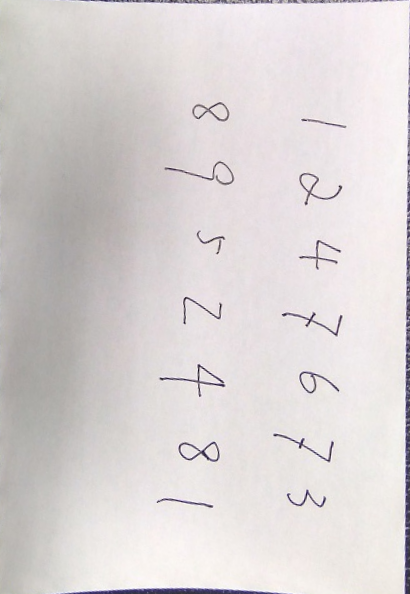
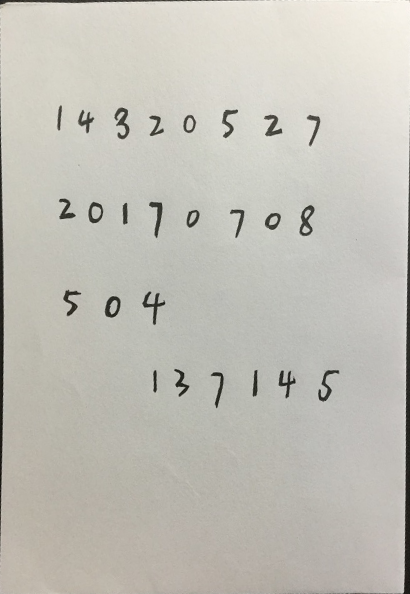
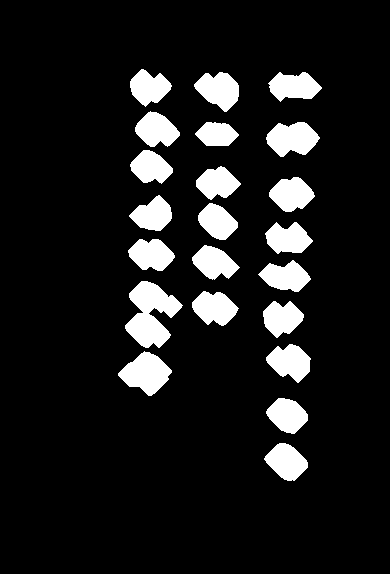
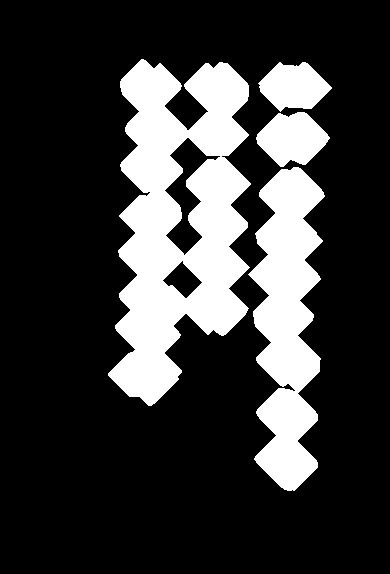
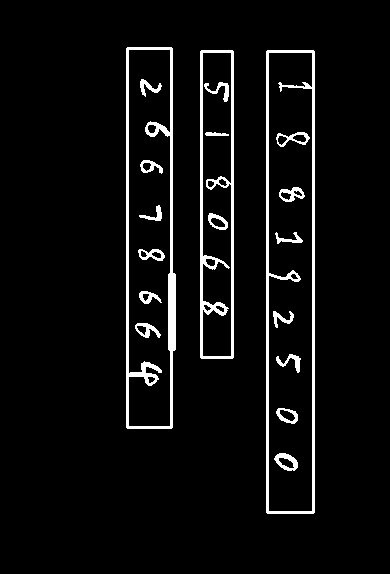
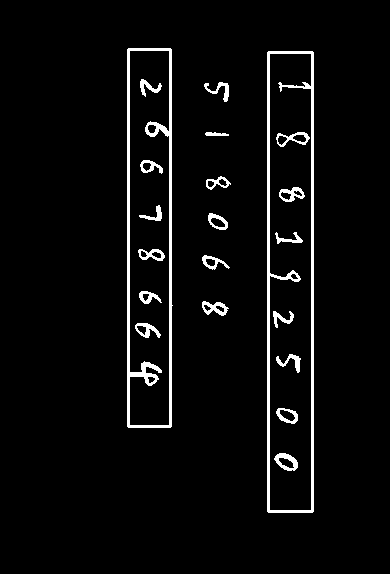
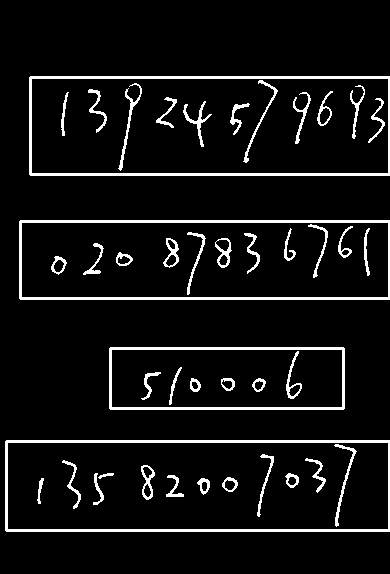
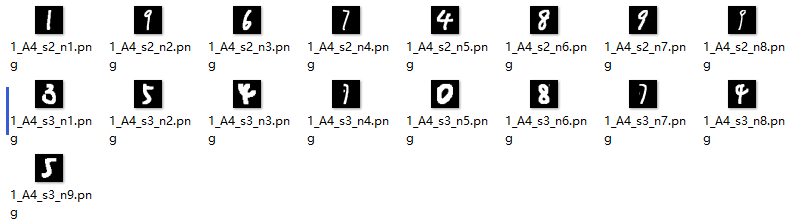
容易集
容易集的三张图片共有73个数字
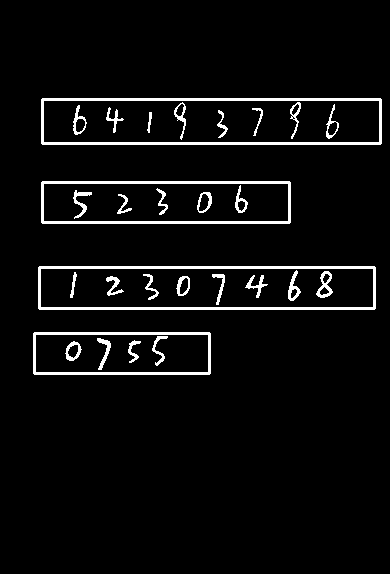
按顺序切割保存如下,文件名指示了对应的图片、数字串、数字序号,皆按照书写顺序。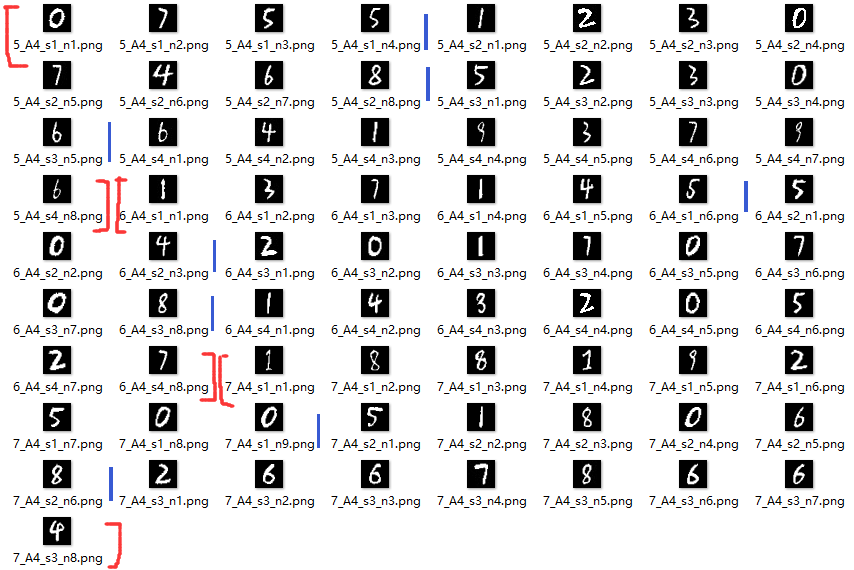
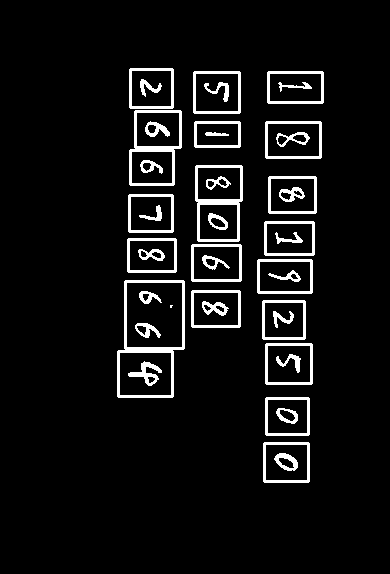
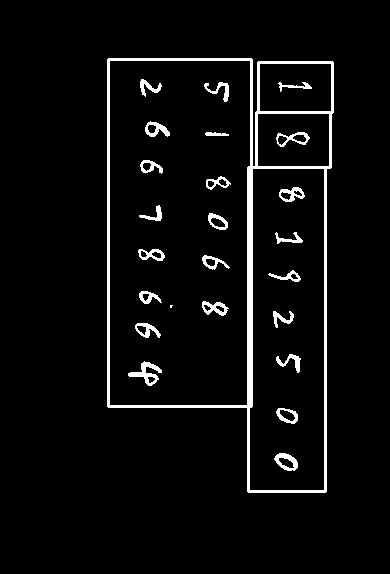
提取后分别用SVM和神经网络进行预测,输出如下
|
|
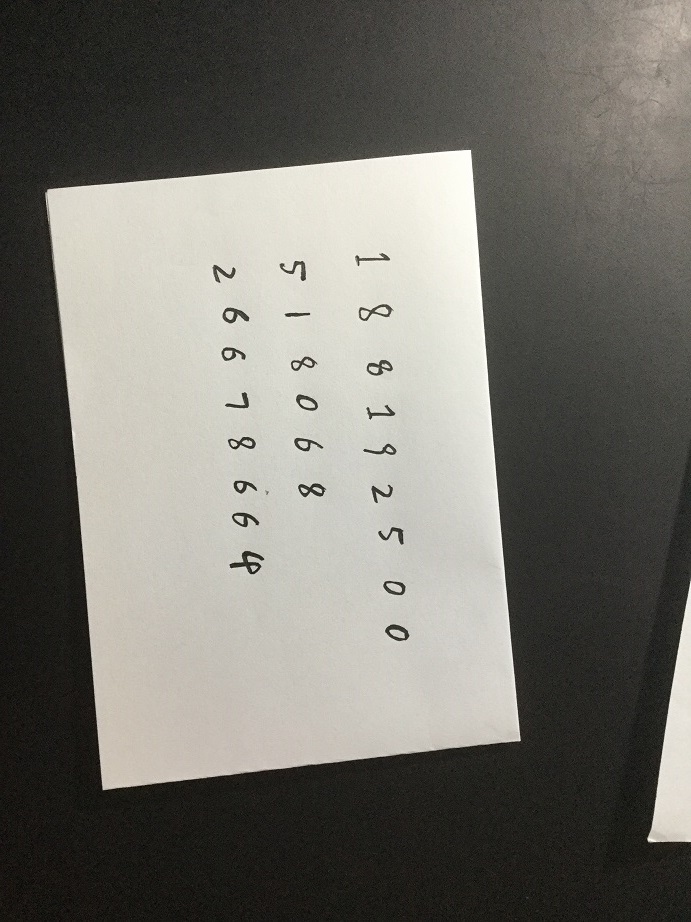
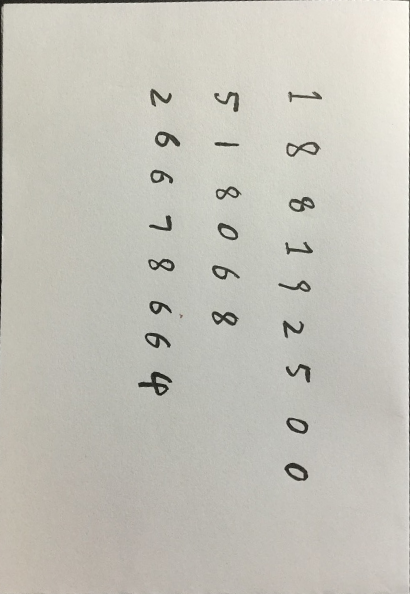
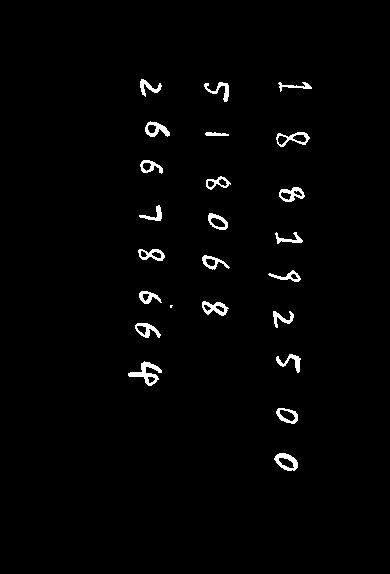
neural network: 1 8 8 1 9 2 5 0 0; 5 1 8 0 6 8; 2 6 6 7 8 6 6 4
svm: 1 8 8 1 1 2 5 2 0; 8 1 8 0 6 8; 2 6 6 2 8 6 6 8
结果表示,使用神经网络可以达到100%的准确率,SVM达80.0%的准确率。SVM的错误主要是7认成2,6认成5,9认成1等比较相似的数字。
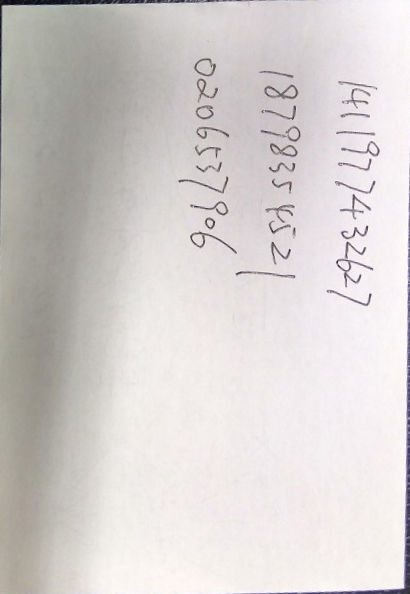
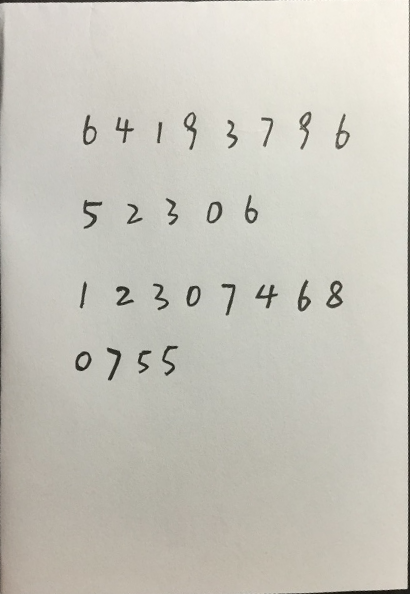
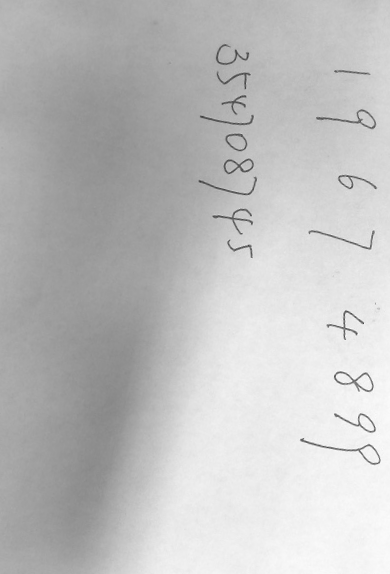
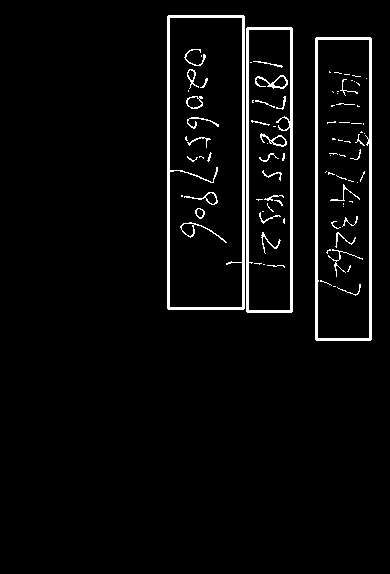
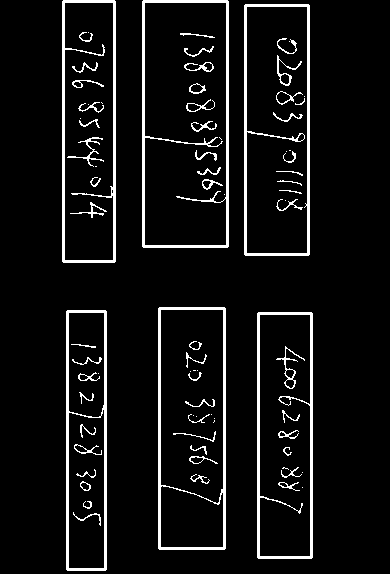
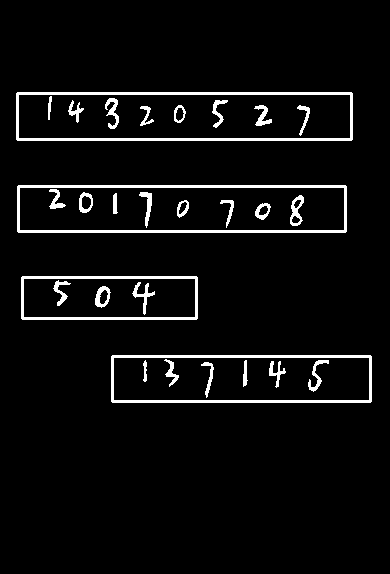
难集
难集的数字较为自ling然luan,下图左中右分别为图1、3、4
图一切割出的数字中7和9是比较难辨别的,因为收尾拉伸得长导致数字过瘦。
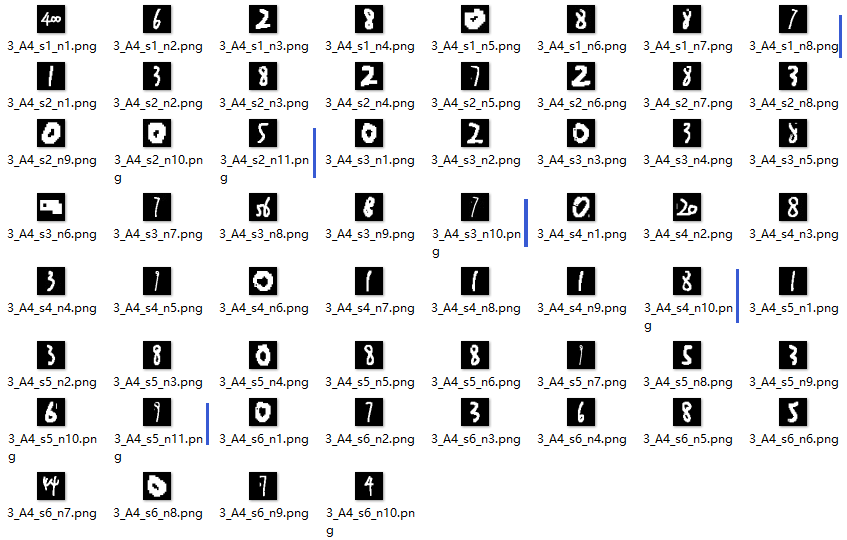
图三出现了数字粘连的情况,需要进一步切割。数字的粗细不一,0较粗,7较细。
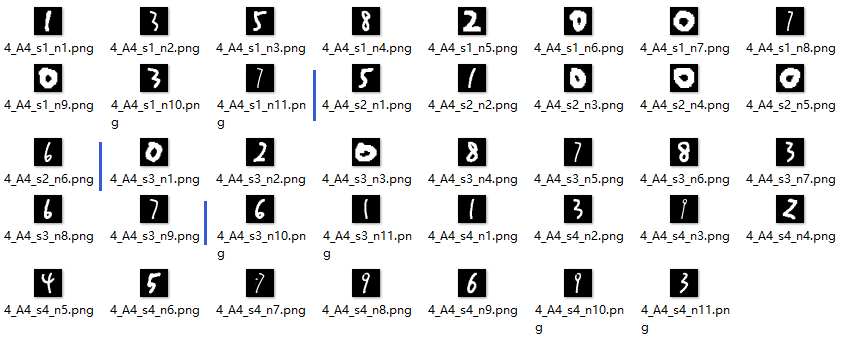
图四的情况类似。这些过细或过粗的数字也是准确率较低的数字。